Lab 1 - Artemis and Bluetooth
Lab 1A
Pre-Lab
I installed the Arduino IDE onto my computer. The purpose of this lab is to become more familiar with the Arduino IDE and the Artemis board. This lab goes over how to program the board, using the board’s LED, read and writing serial messages over USB, and using the board’s temperature sensor and microphone.
Lab Tasks
1) I connected the board to my computer and selected Redboard Artemis Board in the IDE.
2) I used Arduino’s provided example code to blink a LED.
3) I used Arduino’s provided example code to test the board’s serial communication. The baud rate should be 115200 baud.
4) I used Arduino’s provided example code to test the board’s temperature sensor. I increased the temperature readings by pressing my thumb against the sensor.
5) I used Arduino’s provided example code to the test the board’s microphone. I snapped my fingers to have the board detect high frequencies.
Additional tasks for 5000-level students
- To create the simplified electronic tuner, I combined the microphone and Serial output code examples into one program. To determine which musical notes are detected, I used https://en.wikipedia.org/wiki/Piano_key_frequencies and matched the musical notes to the corresponding frequencies. The three frequencies and its corresponding musical notes using scientific pitch notation are: A7 - 3520 Hz, A6 - 1760 Hz, and A5 - 880 Hz. Within the embedded video, the additional code is written in the
printLoudestfunction. I also allowed a tolerance of +/- 10 Hz as certain notes detected by the microphone can have such deviation.
Discussion
From Lab 1A, I learned how to use the Arduino IDE to connect to the Artemis board, flash the board’s LED, send serial messages, and use the board’s temperature sensor and microphone. One issue that I did run into is detecting the Artemis board over USB-C. Apparently, my computer did not have any drivers to detect connections over USB-C, so I had to download the driver before uploading any code to the board. Otherwise, the rest of Lab 1A went smoothly.
Lab 1B
Pre-Lab
For Lab 1B, I downloaded Python 3 and pip, created and activated the virtual environment, installed the needed Python packages, and downloaded the lab codebase into the project directory. To setup the Artemis board, I burned the sketch ble_arduino.ino, and the MAC address is printed in the Serial Monitor.
From this lab, I understand that the codebase sets the local name and service, and adds BLE chracteristics and the BLE service. Through Bluetooth, data can be received from the Artemis board by using BLECStringCharacteristic.
Configurations
-
In
connection.yaml, theartemis_addressis changed to the above printed MAC address -
The BLEService UUID is updated with the generated UUID in the
ble_arduino.inoandconnection.yaml.
3, 4, & 5. The UUIDs are checked to make sure they match in the Arduinio sketch and connection.yaml, the command types defined in enum CommandTypes matched those in cmd_types.py, and the `demo.ipynb’ cells were all ran and tested.
Lab Tasks
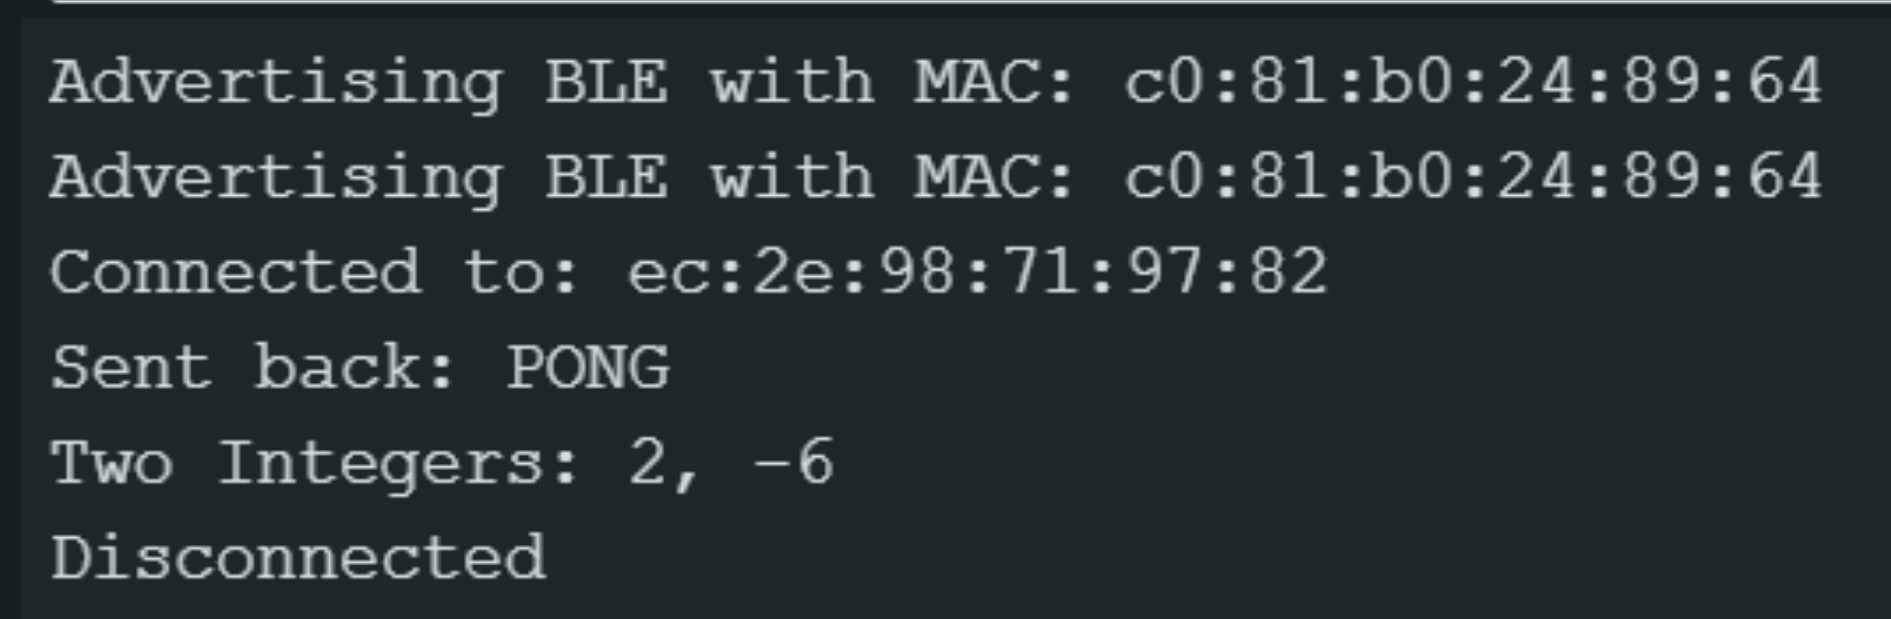
1) To send a string value from my computer to the Artemis using the ECHO command, I wrote the following code within the ECHO command.
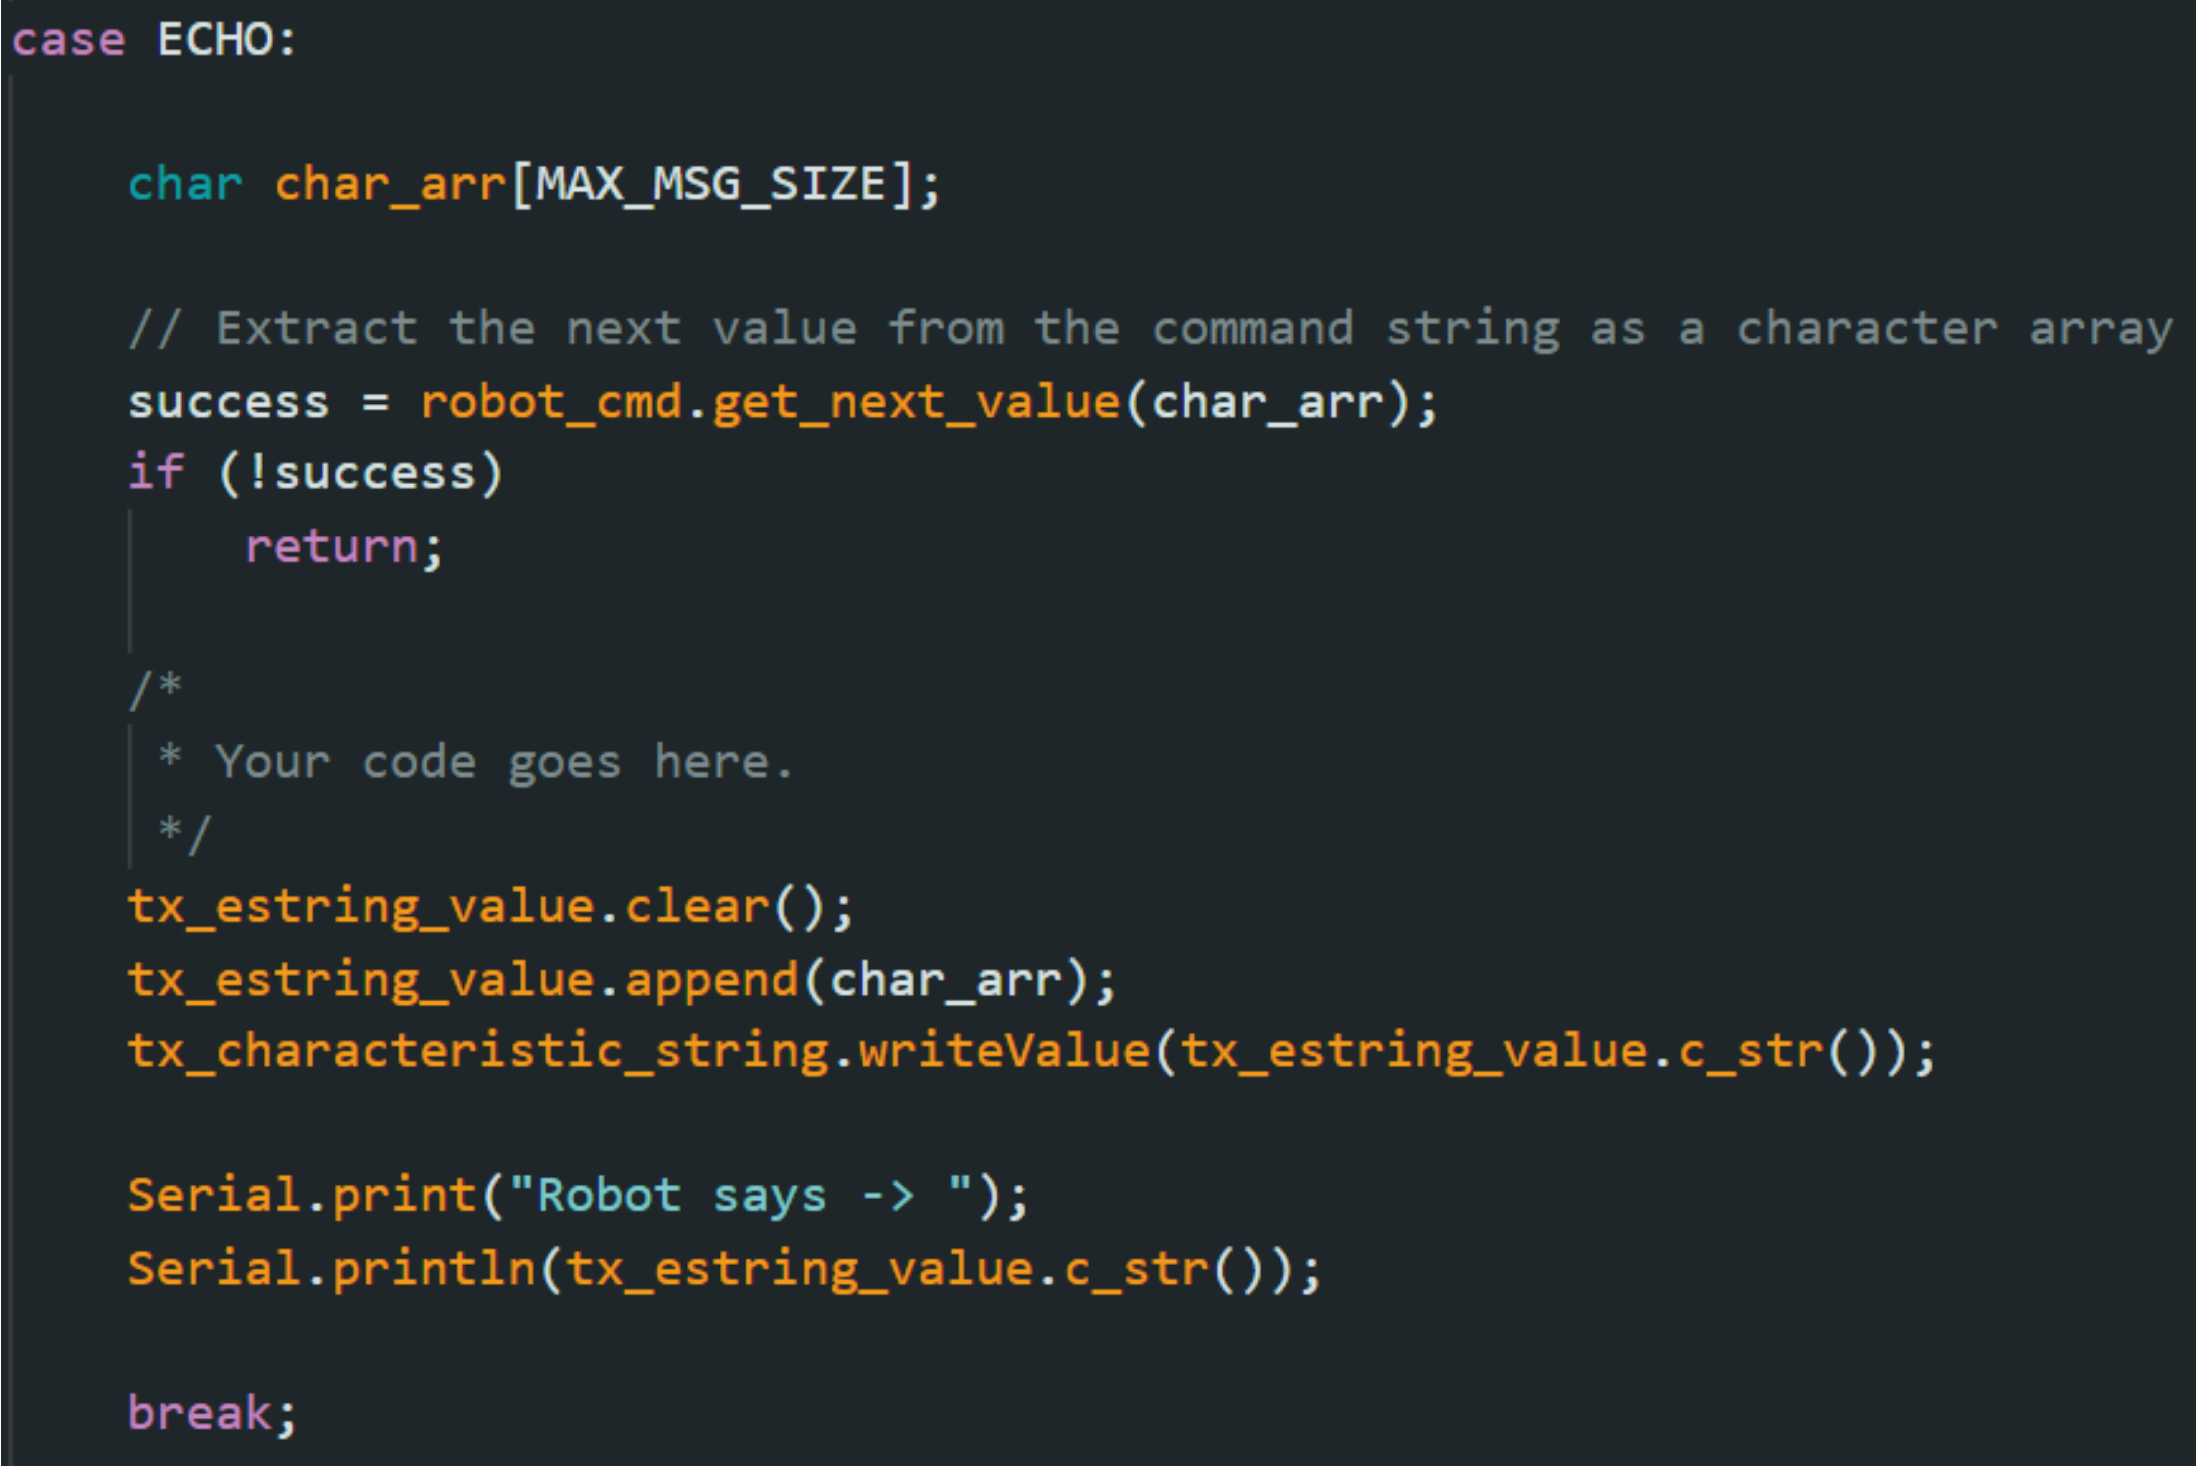
In the Python notebook, the following code is written:

The Artemis board should return a string to the computer in which the computer receives and prints an augmented string. In this case, I sent the message “AHHHHHHHHHHHHHHHHHHHHHHHHHHHHHHHHHH”, and the message is returned in the Serial Monitor in the IDE.

2) To send three floats from my computer to the Artemis using the SEND_THREE_FLOATS command, I wrote the following code in the sketch:
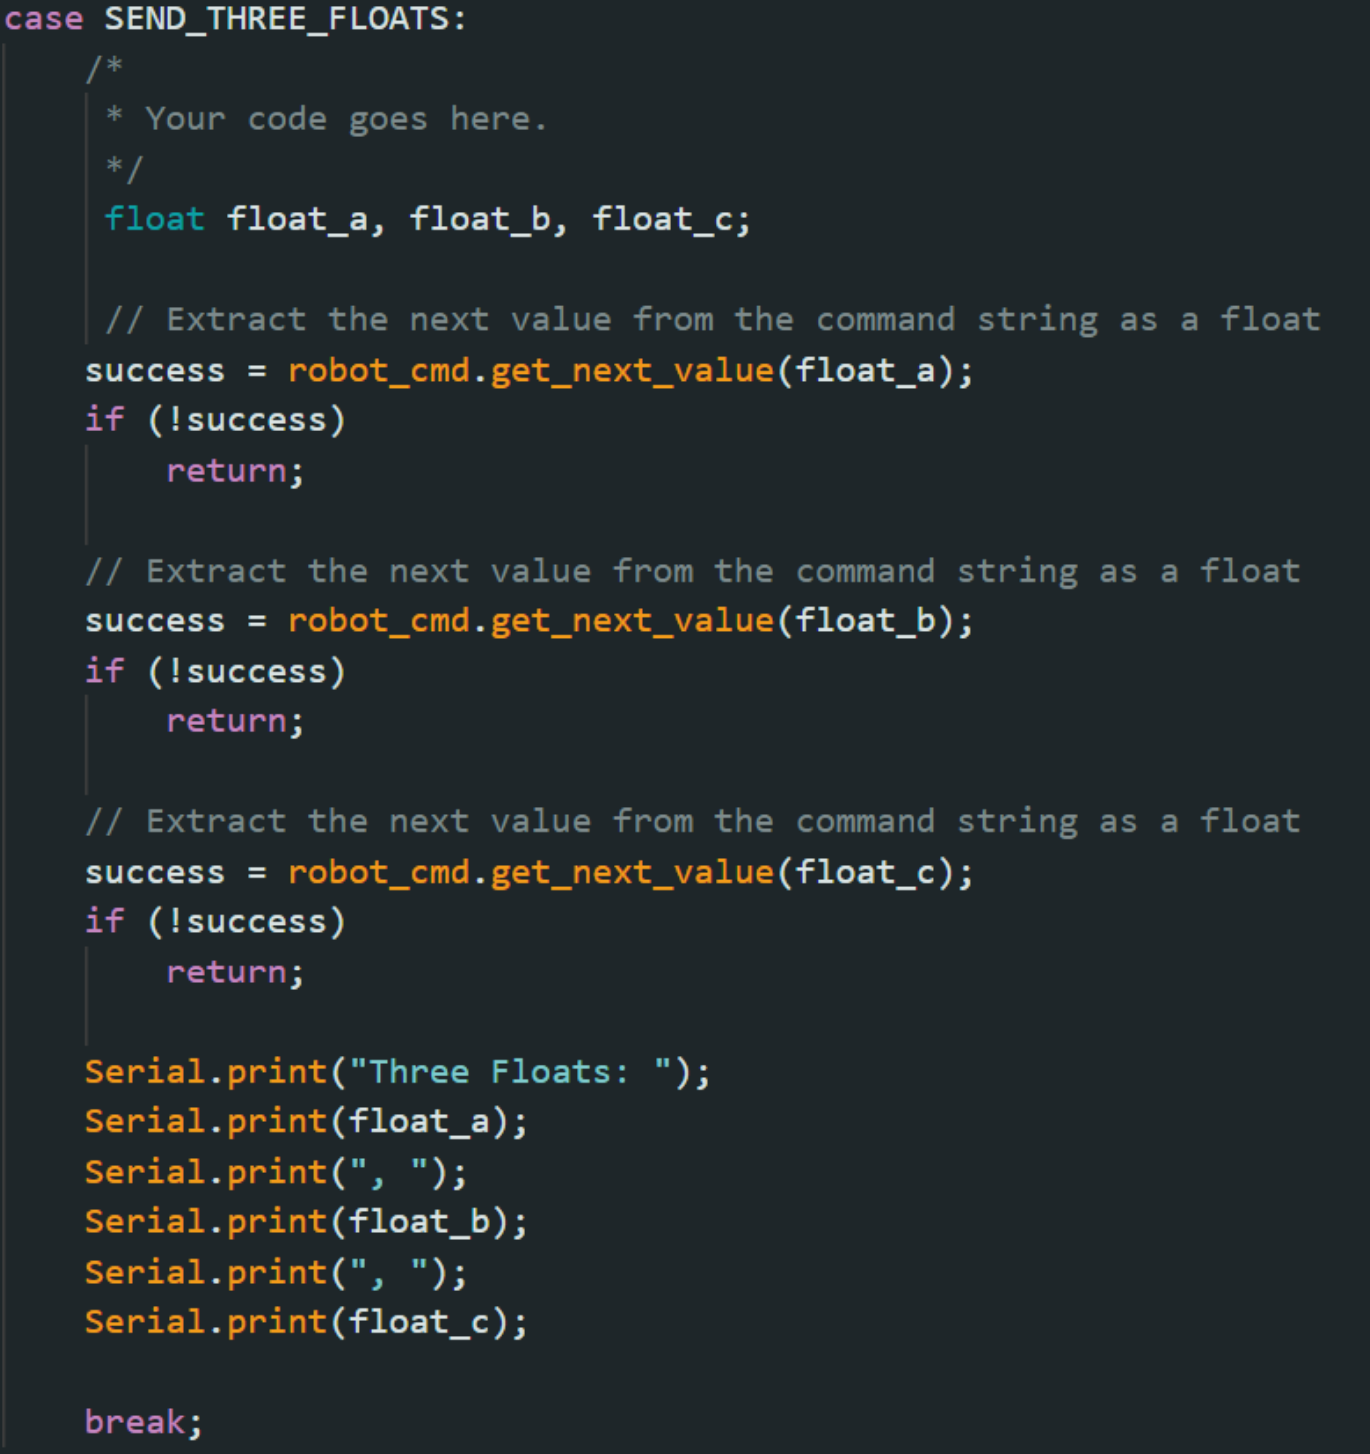
In the Python notebook, the following code is written:

The Artemis board should extract the three float values in the Arduino sketch. In this case, I sent three values of 14.68, 3.45, and 3.14, and the values are returned in the Serial Monitor in the IDE.

3) To make a new command, the class CMD needs to be updated in cmd_types.py and in the sketch.
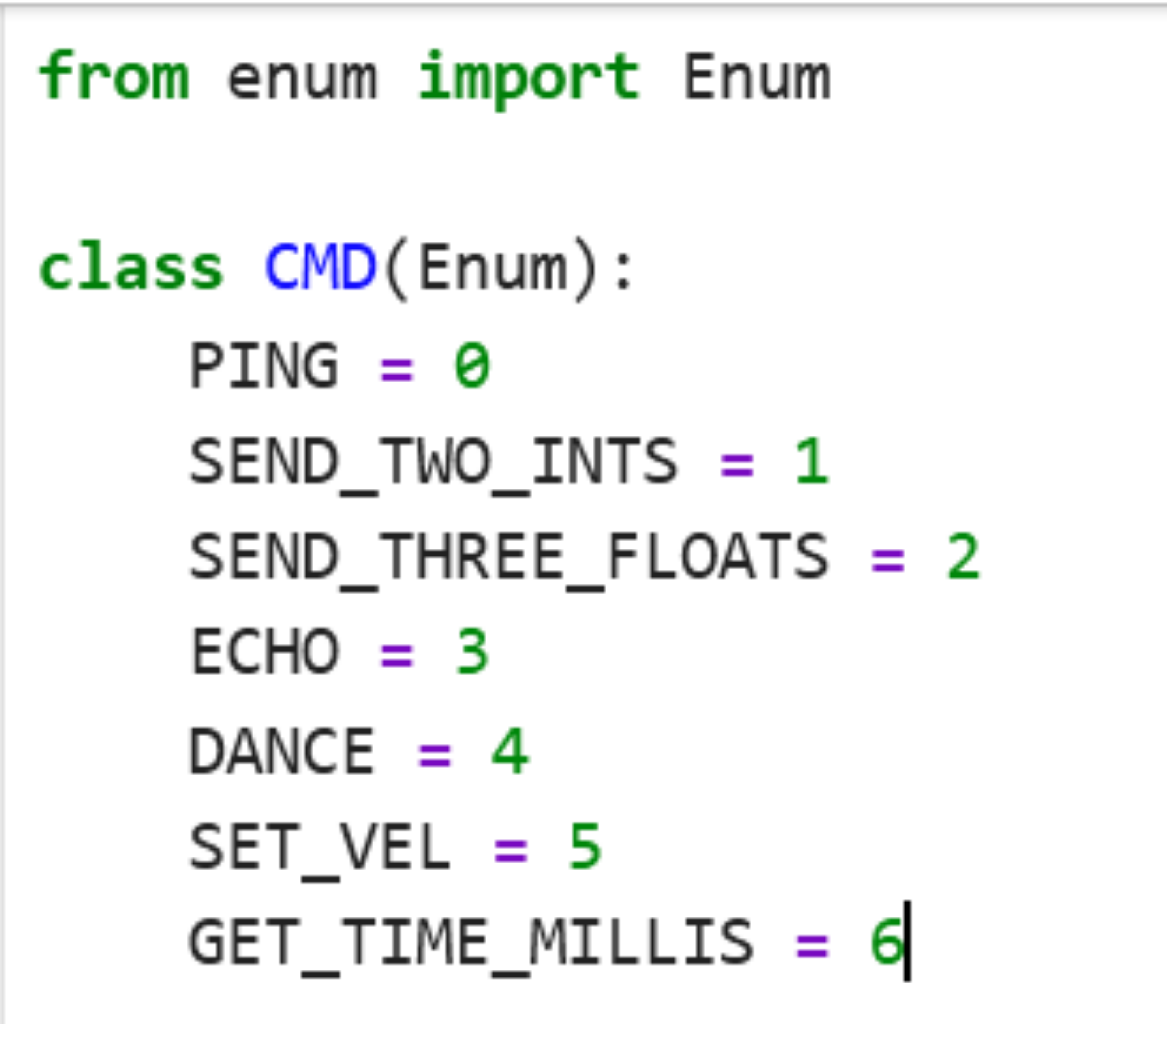
These two steps are repeated every time a new command is created in the following lab tasks.
The command GET_TIME_MILLIS is added into the sketch in which the robot replies with string with the current timestamp to the string characteristic. To implement the command, I wrote the following code in the sketch:
In the Python notebook, the following code is written:

The command is ran, and the serial monitor returns the requested timestamp.
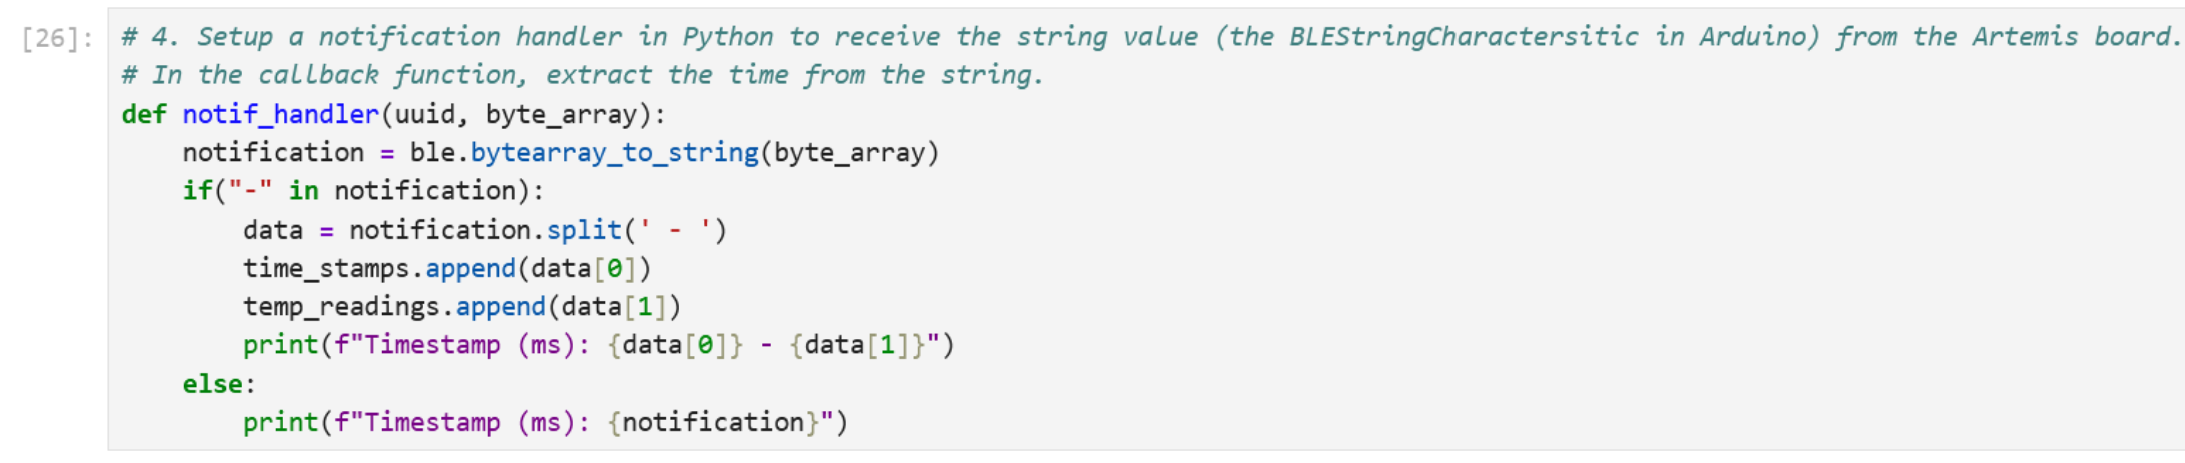
4) To setup a notification handler, the following code is written in the Python notebook:

Whenever the handler is needed, it should output the timestamp into the notebook.
5) A new command TIME_LOOP is written in which the loop collects timestamp values for 5 seconds.
In the Python notebook, the following code is written and the printed timestamps are shown:
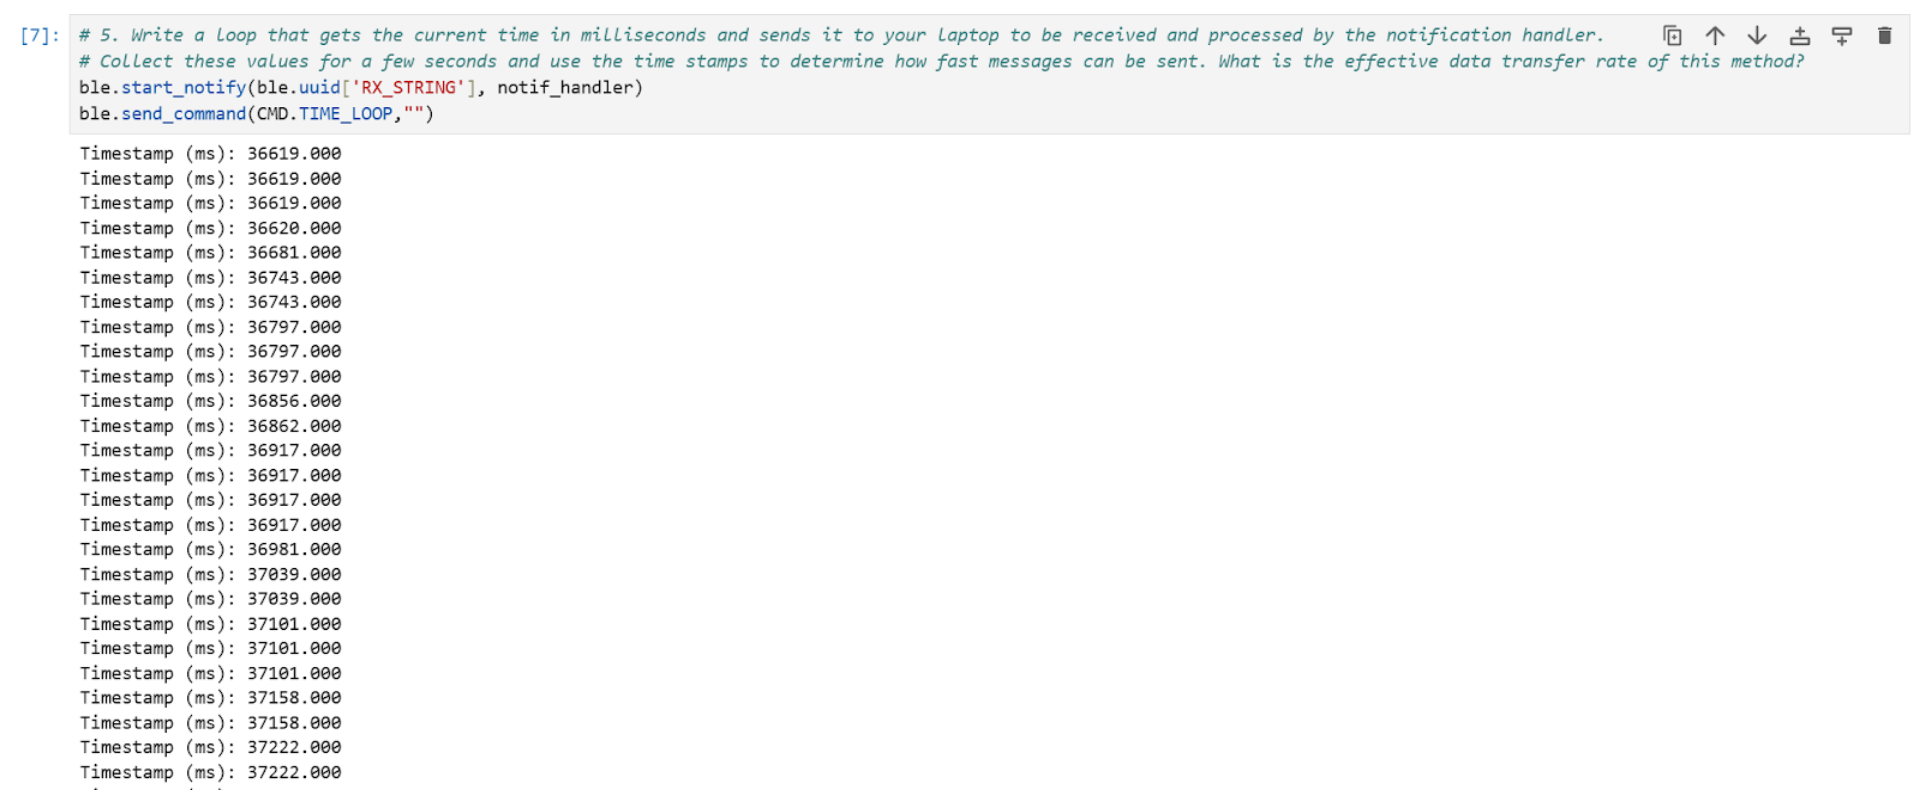
After 5 seconds, 208 notifications have been sent. Each notification was 25 bytes long, so a total of 5200 bytes have been sent. Thus, the effective transfer rate of this method is 1,040 bytes per second.
6) This task focuses on collecting timestamps into a defined array and then sending each timestamp as a string to the computer by looping through the array. A array of size 500 was created.

A new command SEND_TIME_DATA is written in the sketch:
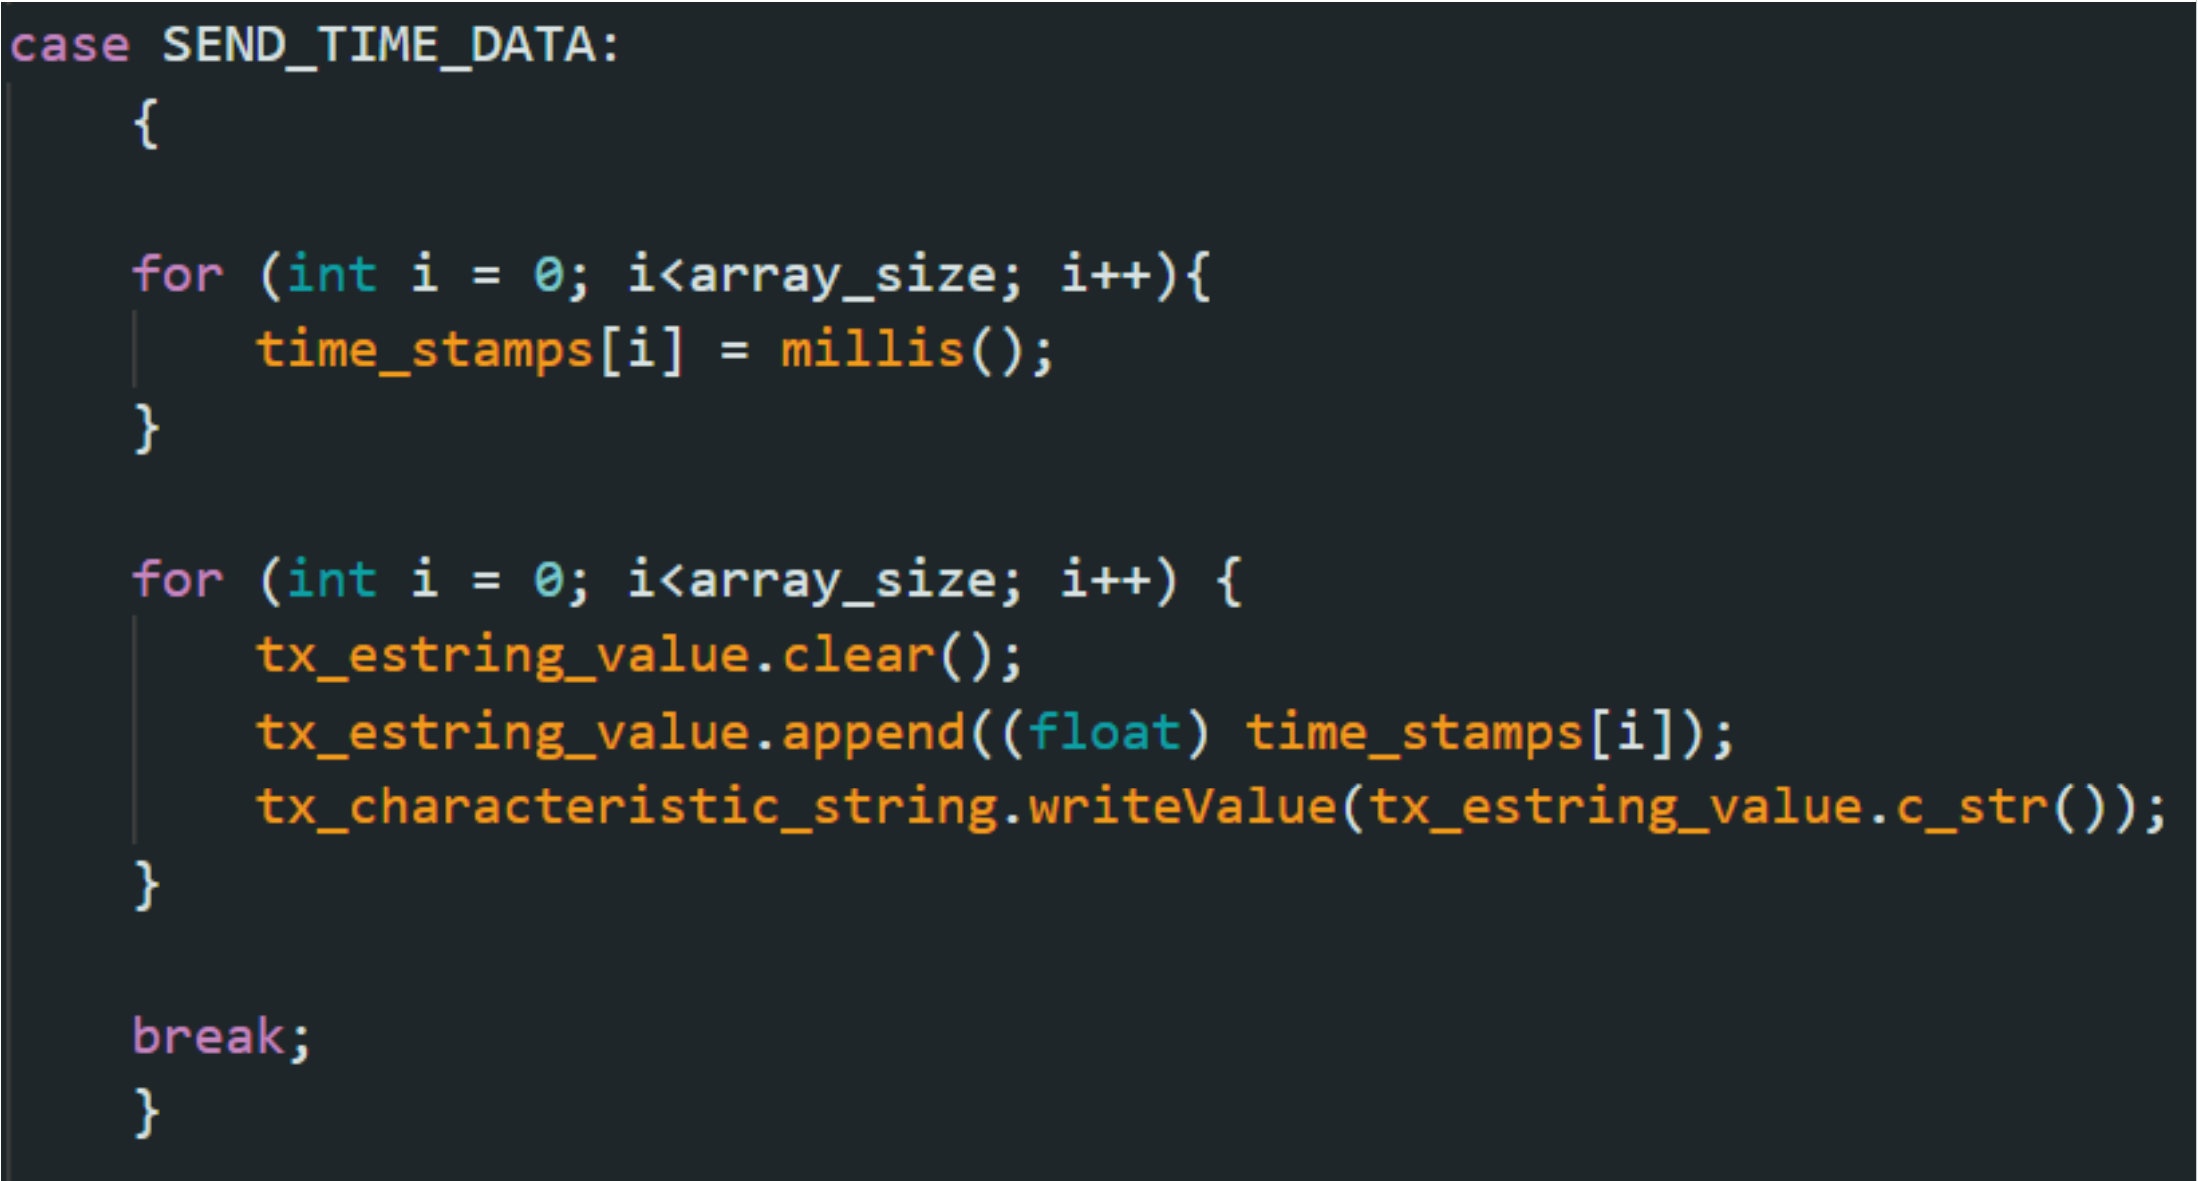
In the Python notebook, the following code is written and the printed timestamps are shown:

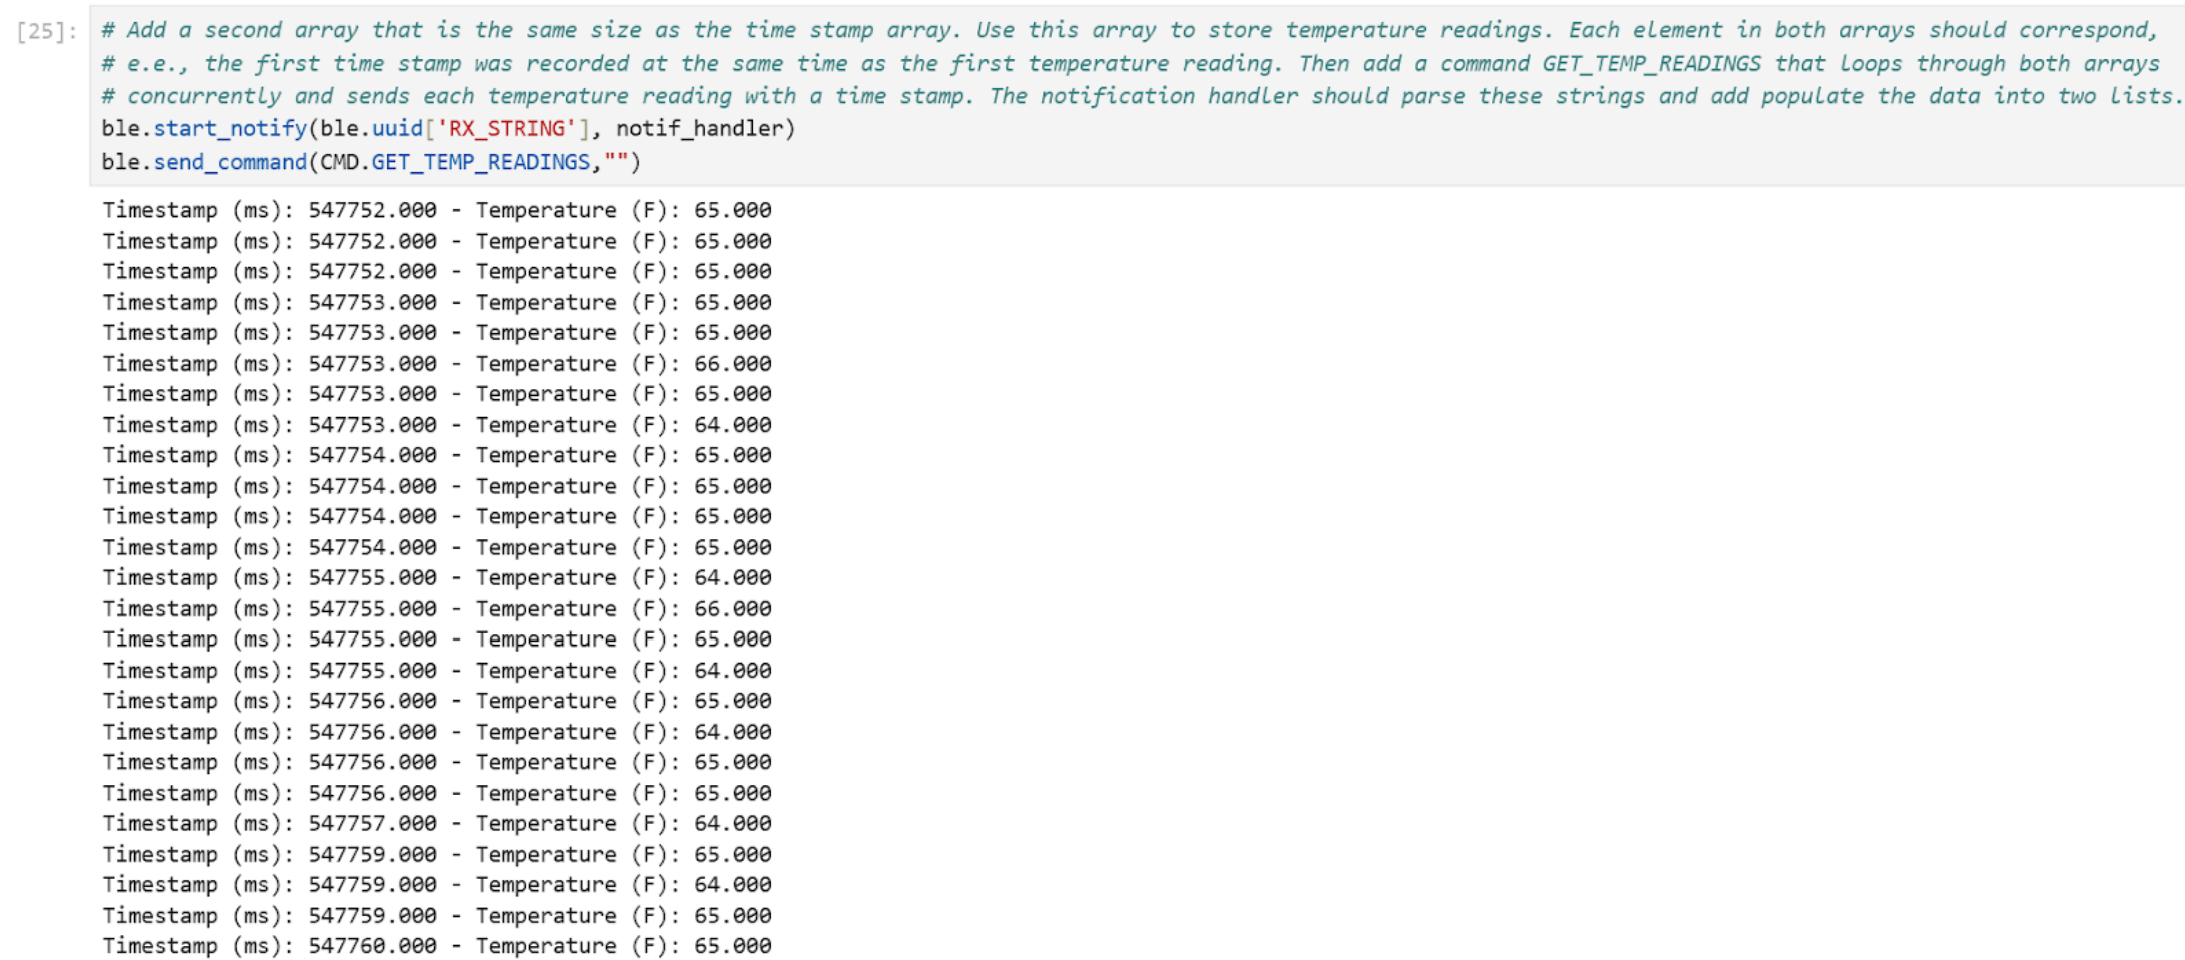
7) Similar to task 6, a second array called temp_readings of the same size was created. A command GET_TEMP_READINGS is created in which it collects both the timestamp and temperature reading on the same iteration, and then outputs it through the notification handler. In the sketch, the following command is written:
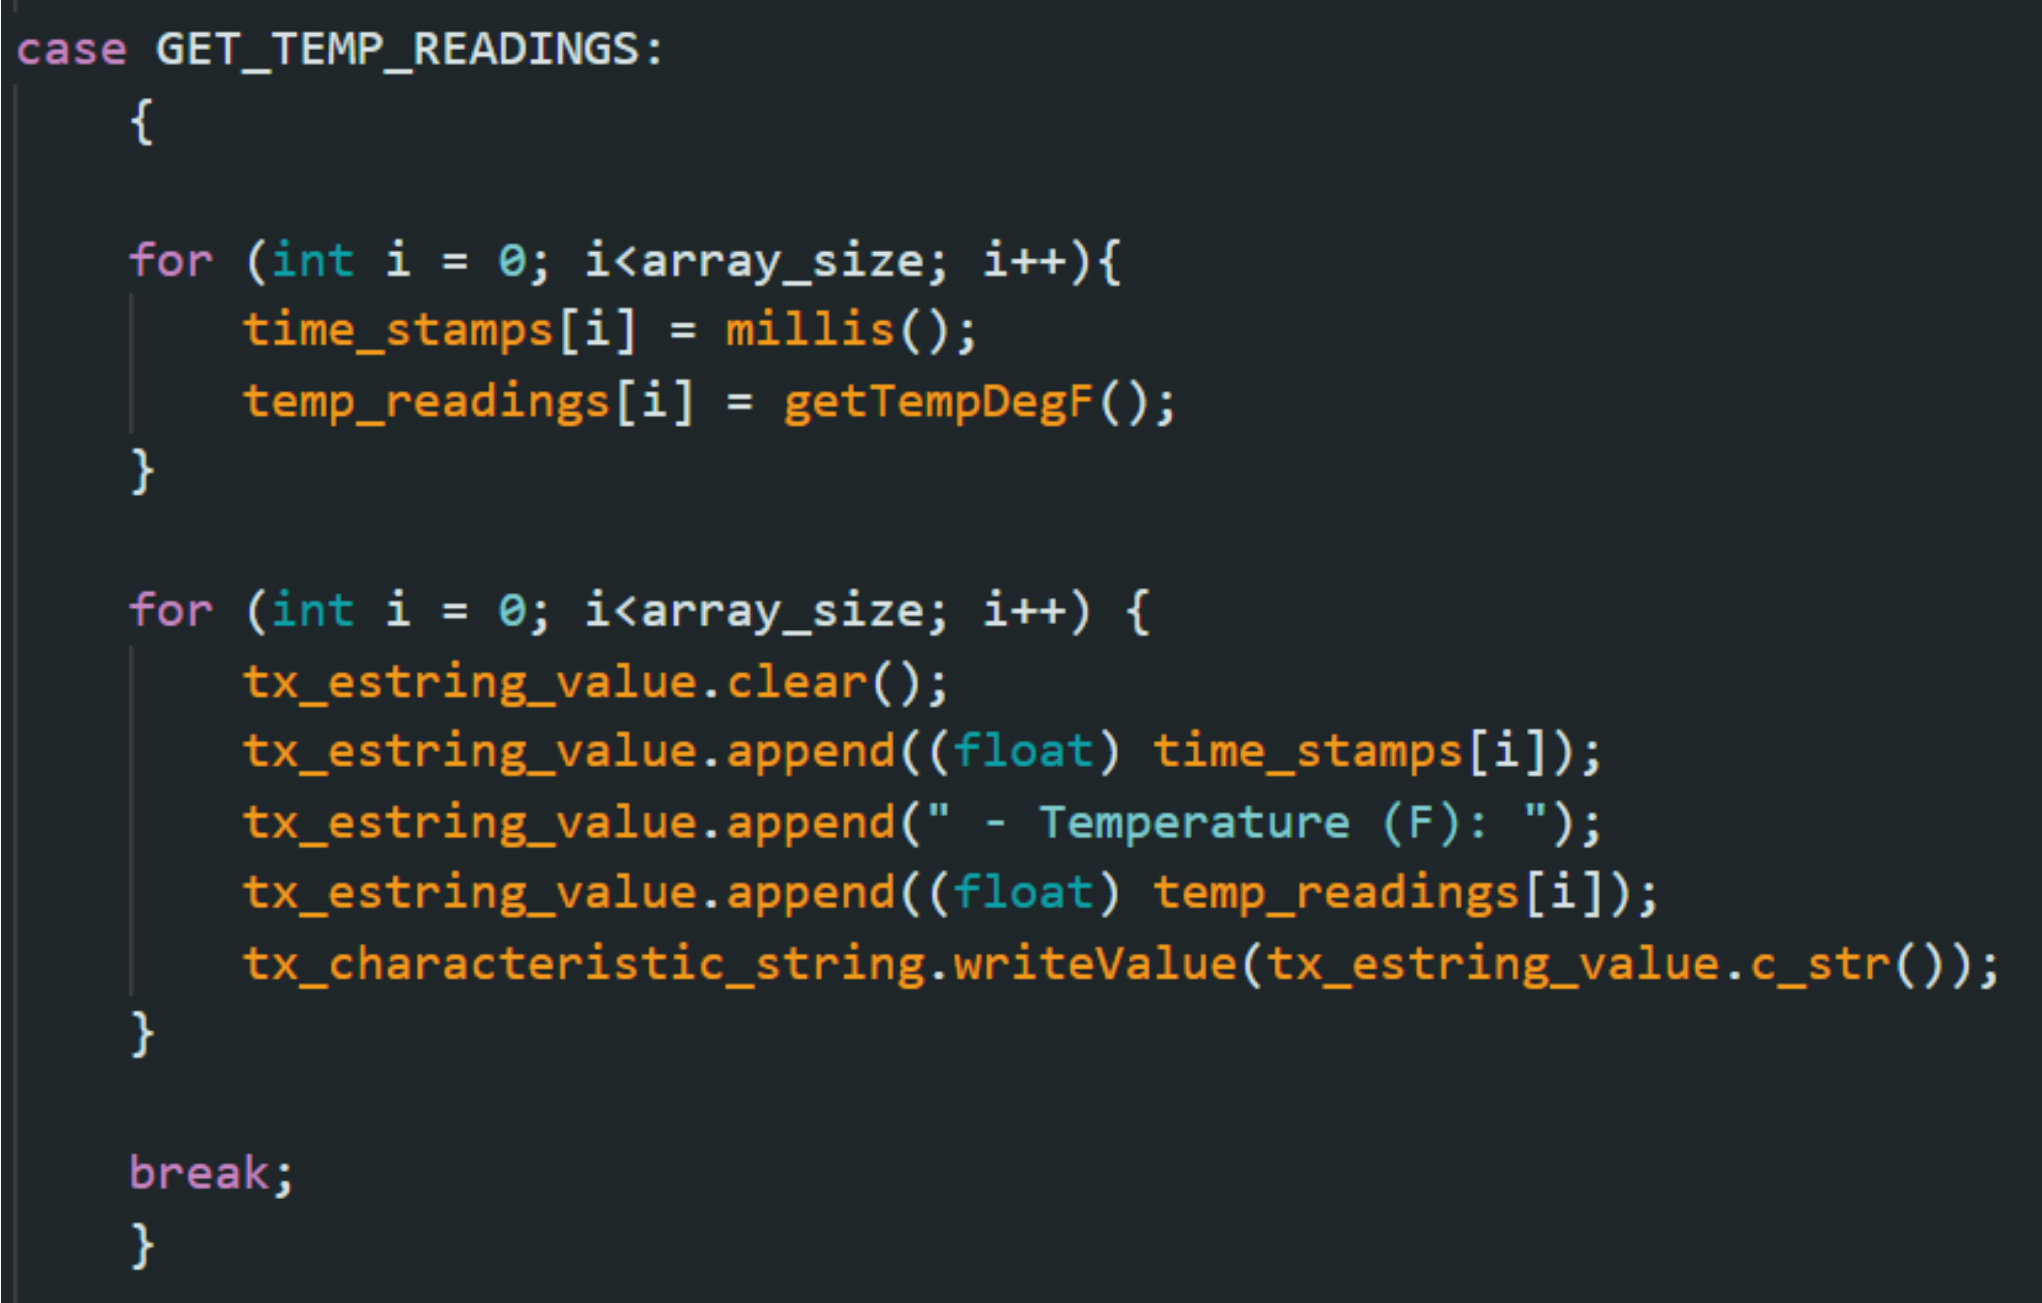
In the Python notebook, the notification handler is updated to parse the strings together and populate the timestamps and temperature readings into two lists.
In the Python notebook, the following code is written and the printed timestamps and temperature readings are shown:
8) The main difference between the methods implemented in task 5 and 6/7 is that it handles and sends data at different rates. In task 6, 500 notifications were sent in 13 ms. Each notification is 25 bytes long, so a total of 12,500 bytes were sent. This calculates into 961,538 bytes per second. In task 7, 500 notifications were sent 172 ms. Each notifcation is 52 bytes long, so a total of 26,000 bytes were sent. This calculates into 151,162 bytes per second. This shows that sending data as an array can allow much faster rates than sending data on each iteration. For comparison, task 5 had a rate of 1,040 bytes per second.
The advantage of sending data on each iteration such as that implemented in task 5 is that is allows us to see data/information in real time. The disadvantage is that it has a slow data transfer rate. This method is best for debugging and monitoring the values of inputs at a low sample rate.
The advantage of sending data as an array such as that implemented in task 6/7 is that there is less overhead and more data can be collected in a short amount of time. The disadvantage is that the data is buffered and cannot be seen in real time until it is called. It is also RAM intensive as more data needs to be stored before it is called. This method is best for collecting data at a high frequency in a short period of time which is appropriate for lab equipment.
With the Artemis board having 384 kB of RAM, approximately 7384 temperature readings with time stamps can be collected before running out of memory. This will occur in about 2.54 seconds.
Additional tasks for 5000-level students
1) Effective Data Rate And Overhead: Send a message from the computer and receive a reply from the Artemis board. Note the respective times for each event, calculate the data rate for 5-byte replies and 120-byte replies. Do many short packets introduce a lot of overhead? Do larger replies help to reduce overhead? You may also test additional reply sizes. Please include at least one plot to support your write-up.
2) Reliability: What happens when you send data at a higher rate from the robot to the computer? Does the computer read all the data published (without missing anything) from the Artemis board? Include your answer in the write-up.
Discussion
In Lab 1B, I learned how to receive timestamped messages from the Artemis board using the notification handler in the Python notebook. One large takeaway from this lab is the difference in sending data on each loop iteration and sending data that is collected in an array. No significant issues came up during this lab.
Collaborators
For Labs 1A and 1B, I collaborated with Sean Zhen (sz378). I also used pages from last year as references from Selena Yao and Angela Voo.
Back to Labs